Top Ten Tips on How to Plant your Spring Bulbs in Pots
We have some simple tips for the best success when planting your spring bulbs in pots*:
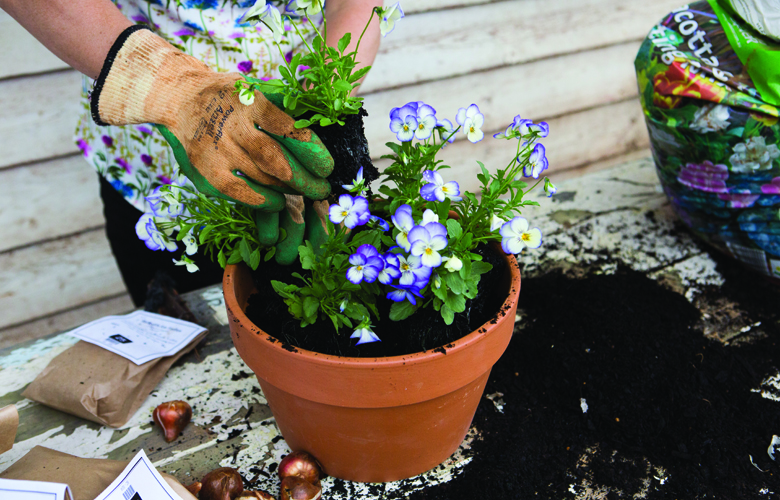
Start with the Right Tools
-
Choose the right bulb for the right pot; the general tenet here is, the bigger the bulb the bigger the pot! This is logical when you think about it, if you use little bulbs like Crocus in a large pot, their impact will be lost. Using big bulbs in small pots not only look out of whack, the bulbs may topple over.
- Pick a container with good drainage. Most bulbs will rot if they become waterlogged so good drainage is a must. If your container has no holes in the base it is a good idea to make some.
- Plant your bulbs using a good quality potting mix. This will help to ensure good drainage; it also contains a few nice nutrients that will give your bulbs the best start.
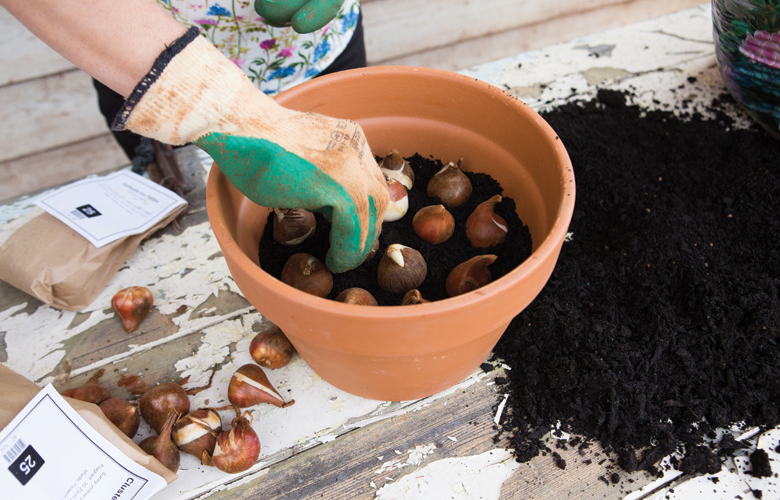
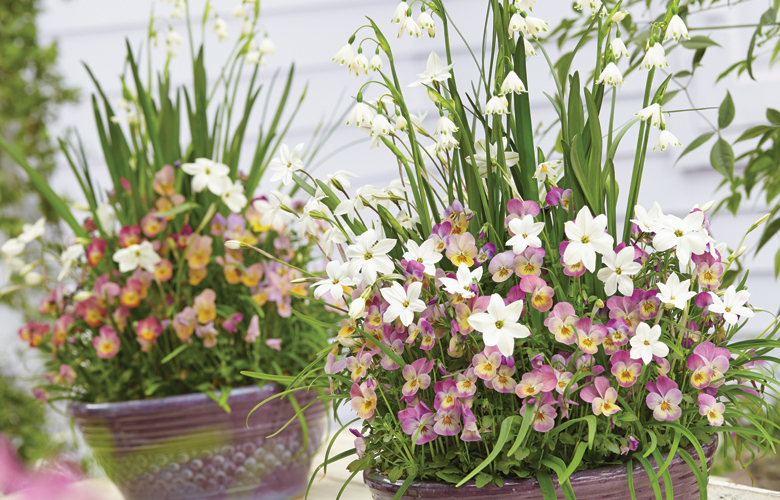
TIP: Plant your bulbs so they are almost cheek to cheek, for a full and dramatic display.
Planting
-
How deep do you plant your spring bulbs? Each variety is a little bit different. The golden rule when planting spring bulbs in the ground is that the bulb should be planted two to three times the height of the bulb deep. When you are planting in pots, this doesn’t need to be the case, you have a little more freedom. You should aim to bury the bulb at least 2cm deep, this will help to provide support for the foliage and the flower stem. There are always exceptions to the rule, for example, bulbs such as Hyacinths with their sturdy foliage can even grow half in, half out of the soil.
TIP: Tulip bulbs have a flat side, when planting in pots, aim to have that flat side facing outward, this is where the first leaf will sprout from and that will help to soften the edge of your pot.
-
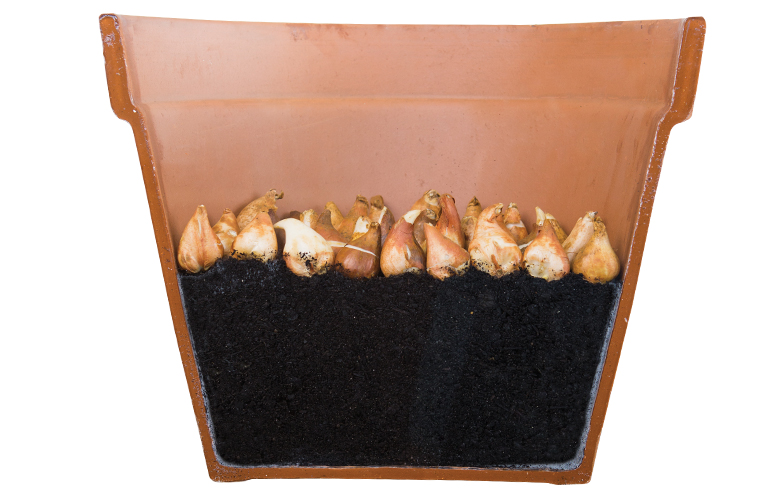
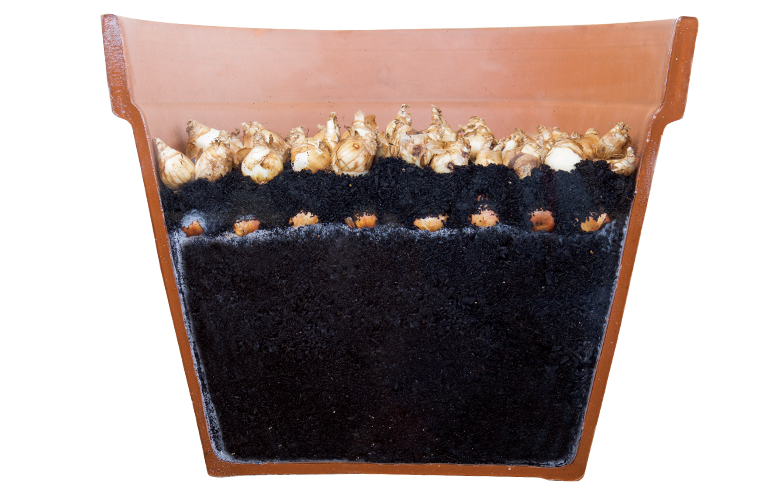
Add your potting mix in stages. Pour some potting mix into your container, then place the bulbs, pointy end up, at their appropriate level before filling the remainder of the pot with the mix. If you are using plastic containers, make sure your bulbs don’t touch the edge of the pot as this area can get very hot and damage the roots. In clay or ceramic pots they are a bit more protected so can be planted right to the edge. Fill the soil level to 2-3 cm below the lip of the pot to allow space for watering.
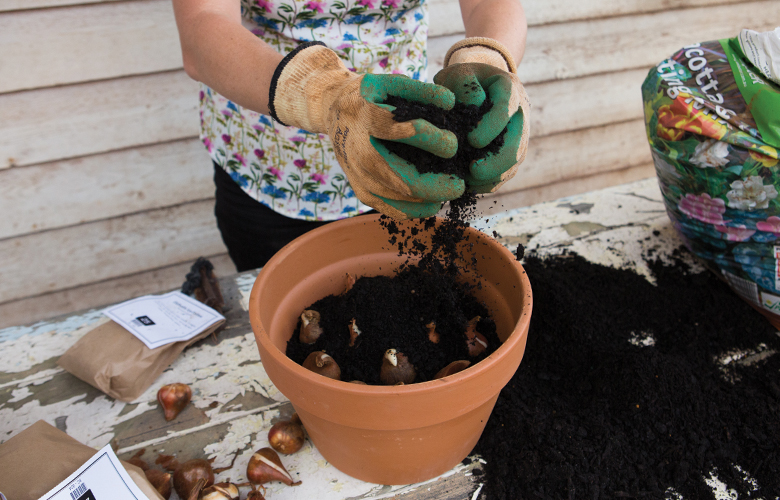
TIP: If you are layering your bulbs, put the tallest, and latest flowering varieties towards the bottom of the pot. Add some more potting mix, ensuring you have covered the first layer of spring bulbs. If your pot is deep enough, you can add a third or fourth layer by repeating the above process.
-
Water them in, with a good, slow pour of water to really wet the soil, do this until the water is running out the bottom of the container. Once the bulb starts to actively grow you then need to keep the water up to them. The most common reason bulbs don’t perform in pots is that they have dried out during their growth process. Remember, pots dry out at a much faster rate than garden soil and so need to be watered on a more regular basis.
TIP: Add some annuals at the time of planting for extra colour and to hide the soil before the bulbs begin to grow.
Add a Little Love
-
Put your pots in the shade to keep them cool and out of the way, until they begin to grow. Once they begin to grow, bring them into the sun. They need the light to create strong plants. If you grow your bulbs in too much shade they become lanky and unattractive.
-
Add some fertiliser, once your bulbs begin to grow. Be it organic, man made, liquid or slow release; by adding fertiliser you will improve the longevity of your flowers and get the best possible show.
-
Enjoy the show!
-
Add some fertiliser once the flowers begin to fade, and keep your pot watered until the foliage begins to yellow. The bulbs are about to rest for the next season.
* We recommend that bulbs such as Tulips and Hyacinths should only be planted for one year in pots. So once the flowers have finished, you have a couple of choices:
- After they have been grown in a pot, you can plant the bulbs into the garden to help replenish them. Do this the following autumn (in the pot you will need to add a some fertiliser and keep watering your spring bulbs until the foliage has yellowed, then you can either dig them out and store them somewhere cool and dry, or store them in the pot until it is time for replanting).
- You can treat them as annuals, throw them on the compost and get some new ones next year. It might sound a bit frivolous, but spring bulbs are inexpensive and with new ones every year you are guaranteed a great show, and can choose from so many different varieties and combinations.
 MONEY BACK GUARANTEE
 GUARANTEED DELIVERY
 SECURE ONLINE PAYMENT
 CUSTOMER ENQUIRIES 1300 428 527